Another side track/experiment
As part of my obsession with finding the ideal wall switch, I found these Livolo brand switches via Aliexpress. Aliexpress seems to be the “go to” place to find just about anything these days.
I ordered one single switch version VL-C301-81 and one four switch version VL-C304-81. Both without the option radio interface or the A/B switching options. The radio interface, after thinking about it, would have been quite handy– oh well, they are cheap enough to order more if required.
Why these ones? Looking at the marketing images on the Aliexpress pages seemed to show that they are relatively simple in design, with an upper and lower PCB connected with standard headers. A nice point to be able to hack into it. Also of note to the hacking people among us one of the images showed that the top PCB appeared to have a PIC processor on board – hmmm.
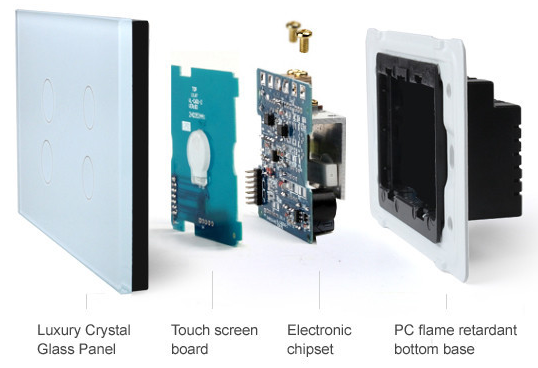
The idea was buy the switch, remove the original back PCB (the one that does the 240V and relay stuff) and substitute my own low voltage PCB – with simple connectors or more advanced CAN interface. The top PCB hopefully wouldn’t be any the wiser. The end result would be a nice looking touch switch that hooked into my home automation system.
Installation
The single switch plate went into service replacing the standard Clispsal switch my FutureTAB HQ office. Installation was quick and easy – just make sure to turn off your breakers before playing with any mains voltage stuff – or better yet get an electrician to do it for you.
Another reason I want to replace all my switches with low voltage equivalents and have other ways to flick the mains to the lights/appliances/etc. I hate touching anything with mains involved.
Usage
I like the way they work. The touch area is quite tight around the indicated circle. The blue “idle” LED is very dim, barely visible in the dark, but it is far easier to find the switch in the dark. Generally blue is an annoying color, especially if its bright and/or in your face, but this one could have been a little brighter – maybe a hack for later. The “on” red LED I really can’t see when the light is on – so maybe its useful, maybe not – again maybe a hack to make it brighter. The relay clicking is no louder than a normal Clipsal switch – so nothing to gain there. It is also easier to turn on the lights when my hands are full with food/coffee/etc – less chance of spillage accidents – bonus!
I have a home theater sub woofer with one of these annoying bright blue LEDs – it has a strategically placed piece of tape covering it up – A bright blue LED shining in your eye while watching a movie in a dark room — WTF were they thinking?
“Don’t Turn It On, Pull It Apart” – EEVblog
In my case I say turn one on, take the other one apart!
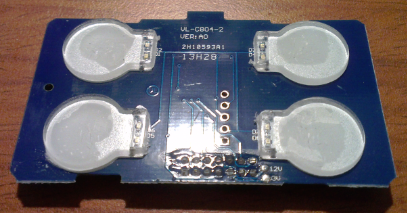
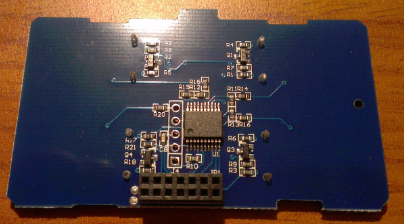
The photo above was exactly what it was inside – how nice of the Livolo marketing folks. The photos below show the top PCB that I want to interface with. Clearly visible are the four LED and touch switch areas with some clever use of the silkscreen underneath the clear plastic parts to aid in light reflection. The bottom of the PCB shows the PIC16F960 and the 14 way header used to connect to the bottom PCB. They have even included what looks like a PIC programming header – hmmm.
Stay tuned for details on how I go with the hacking experiments.